JMJ
Here’s what happened when my dream materialized,
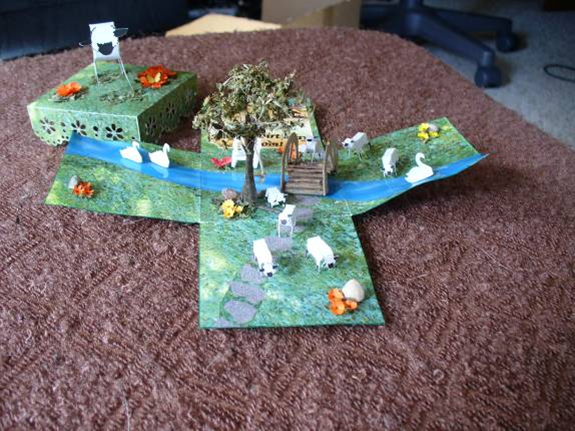
of a miniature garden meeting a box card:
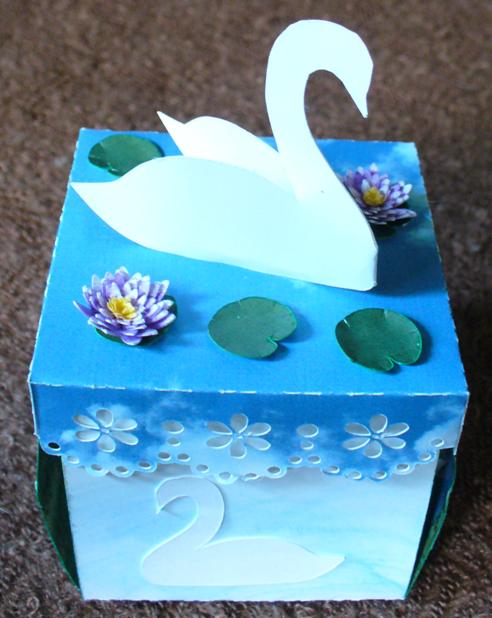
Swans
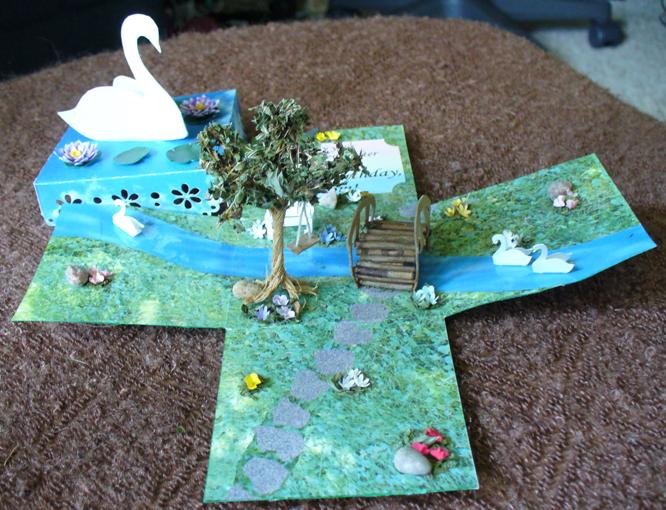
Lift the lid…
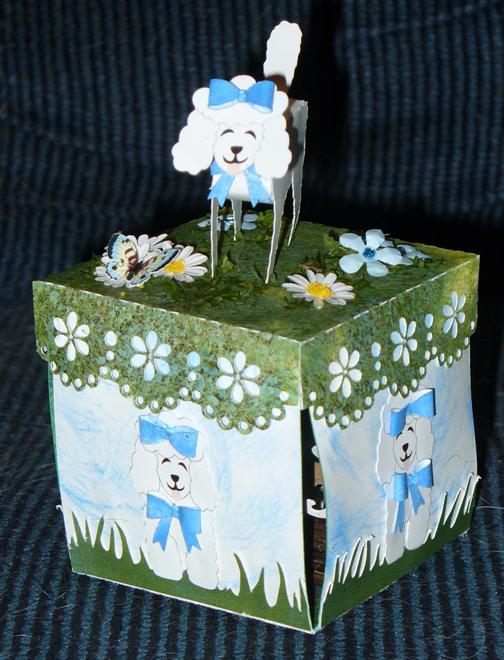
Dogs
(my photos of the inside didn’t turn out, but they’re similar to the…)
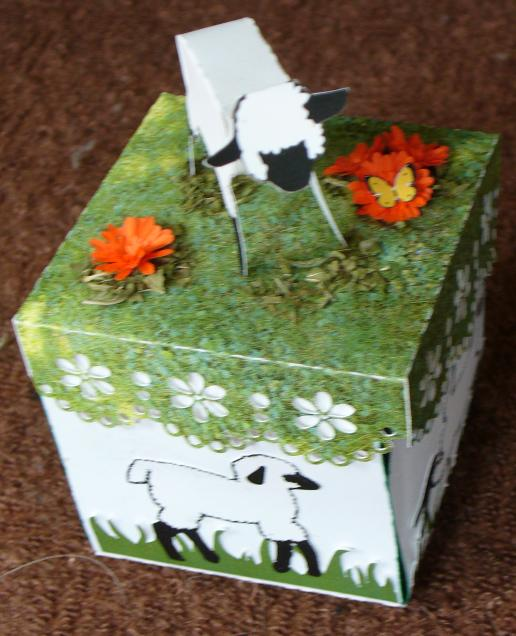
Sheep
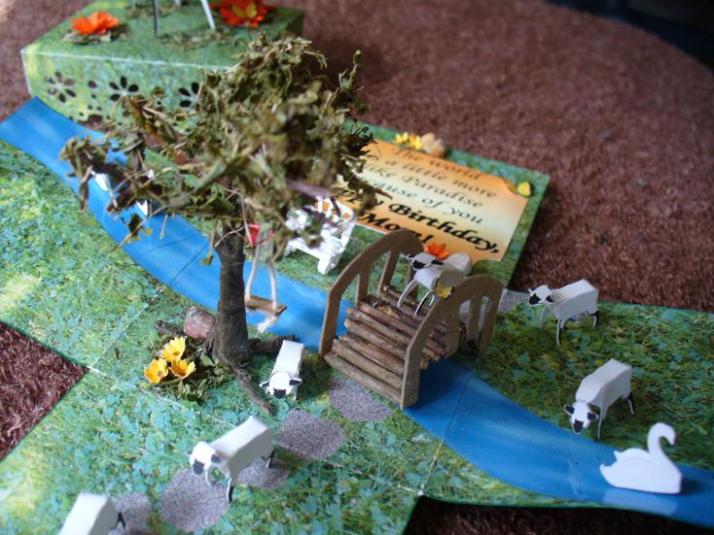
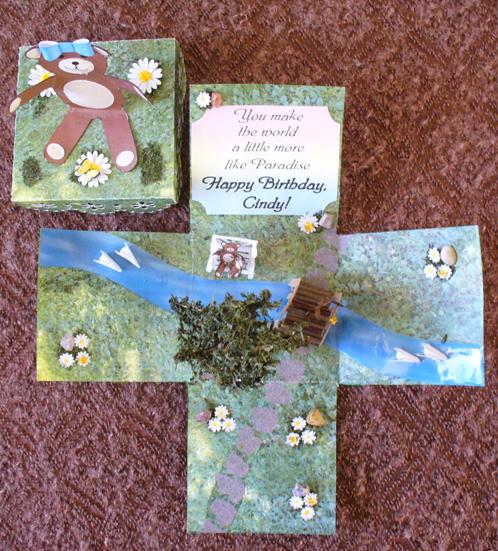
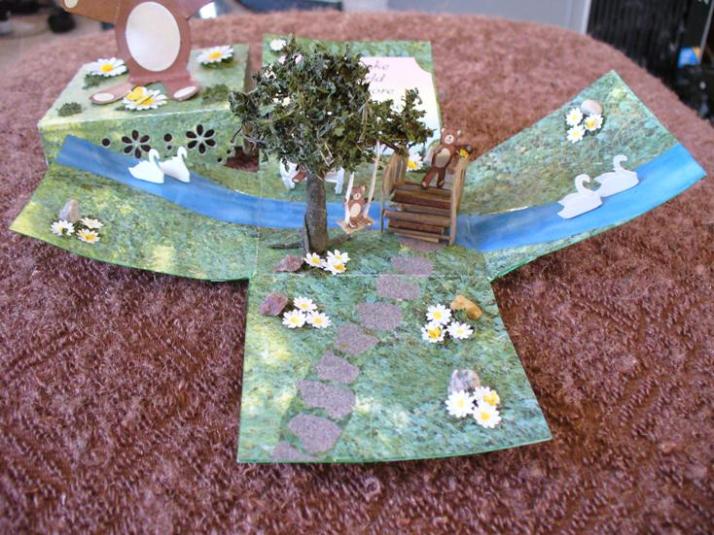
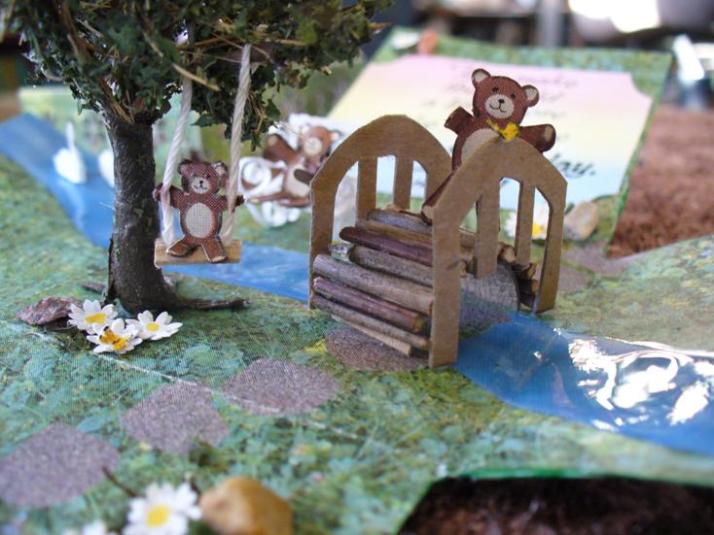
Teddy Bears

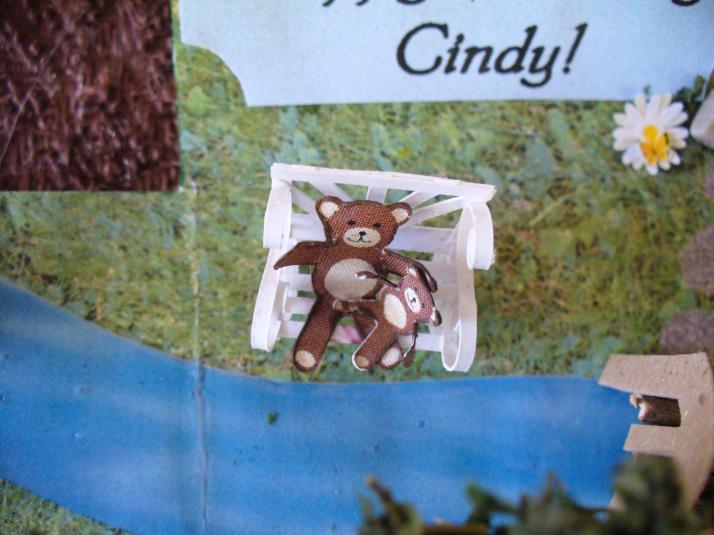
I can’t get enough of these! One of these days I need to make one for myself so I can just look at it :)! Pictures just don’t capture the magic of them…and that little teddy bear on the swing is too cute! (not that he wanted to stay there–he wanted to jump off & play somewhere else! ;).
The boxes are as large as I can make them from 8 1/2″x 11″ coverstock (final 3D size is roughly 2 1/2″ on all sides–slightly taller than wide).
Lids are cut, folded & glued (the white rectangles are the tabs that hold them together).
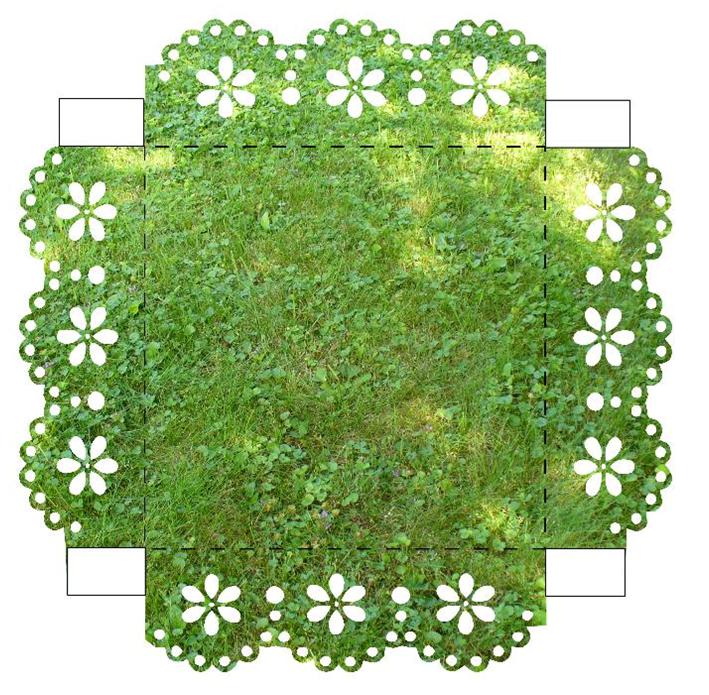
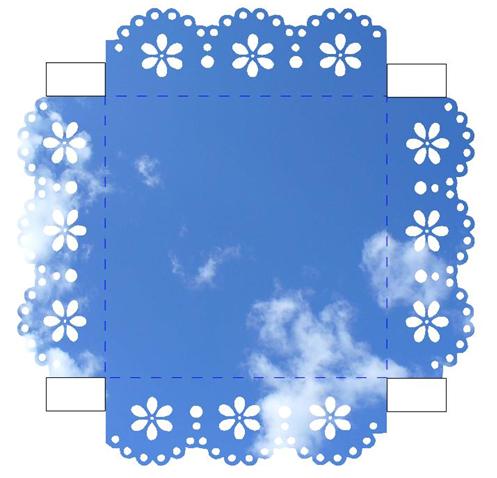
Most of the pieces were cut using a Silhouette Portrait.
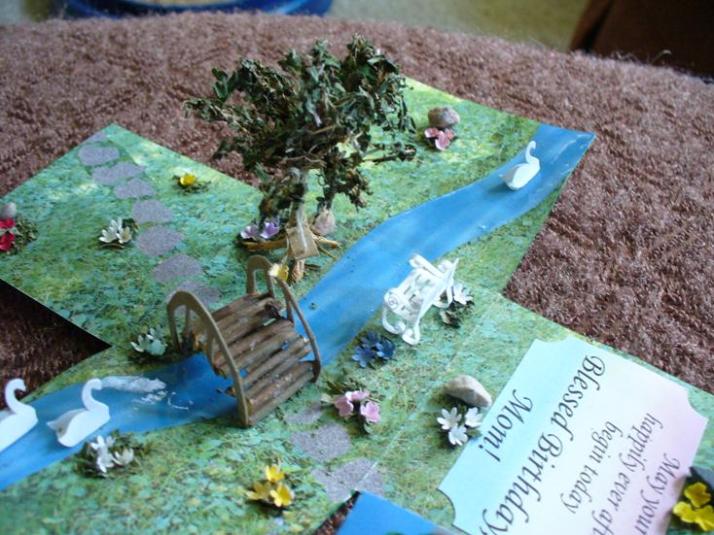
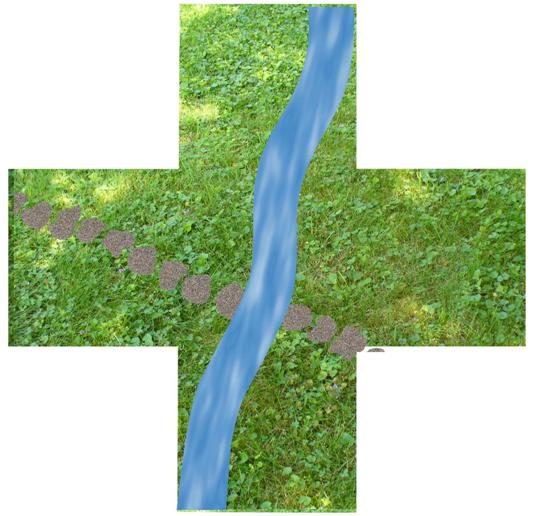
The grass is a photo of our lawn.
The water is a photo of the sky, made “watery” with “Glossy Accents”.
The bridge is made by curling a strip of chipboard & gluing tiny twigs of mock orange over it. The railings are cut from chipboard & glued on.
The bench is quilled from strips of coverstock.
The first couple of trees were made using this tutorial, and later ones were made in a similar way, but using branched mock orange twigs taped together with brown floral tape, still gluing on snippets of twine to fill out the “branches” before adding the “leaves” (it was quicker & less messy). Instead of painted sawdust (which I don’t have), I used crumbled dried leaves (mint or parsley, depending which I had in greater quantity). They will fade more over time than the painted sawdust.
The swing is a tiny rectangle of chipboard threaded onto crochet thread–which kept twisting on me! I finally dropped the thread in boiling water & let it dry before using it, which seemed to help relax it. The thread is then glued to the branches of the tree (which requires some patience).
The flowers are mostly punched & shaped with a stylus on a mouse pad. The ones inside are glued around clumps of more dried leaf crumble around tiny stones, both for decoration & to give the sides a little more weight so they fall when the card is opened (the sides still need a little coaxing to go flat).
The teddy bears are cut flat & pasted back to back (so they’re brown on both sides) & shaped to fit the setting.
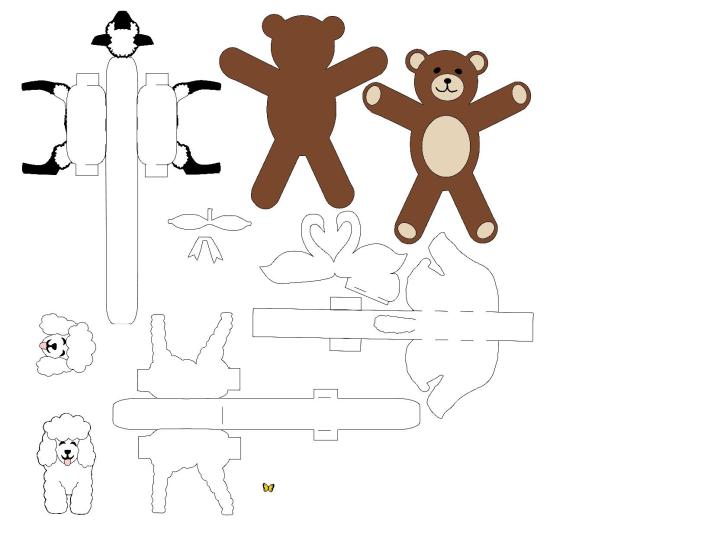
Swans are folded so the triangle is underneath, holding the “tails” apart. Heads & necks are glued together.
Dogs & sheep are folded & glued at the tabs (the long strip wraps around to form the underbelly). This template also includes a sitting dog, which I don’t have in the photos.
The ends of the bows are folded (rounded, not creased folds) to overlap in the center, where they are glued. The piece sticking out at the center is then folded around (over) the ends & glued.
To sign the cards, I either wrote on the inside of the top before gluing it together or wrote on a little square of paper that I then glued into the top.
If you make something like these, I’d love to see it!