JMJ
I was given a crocheted rosary by a friend who was interested in learning to make more rosaries like it.
She asked me to figure out the pattern.
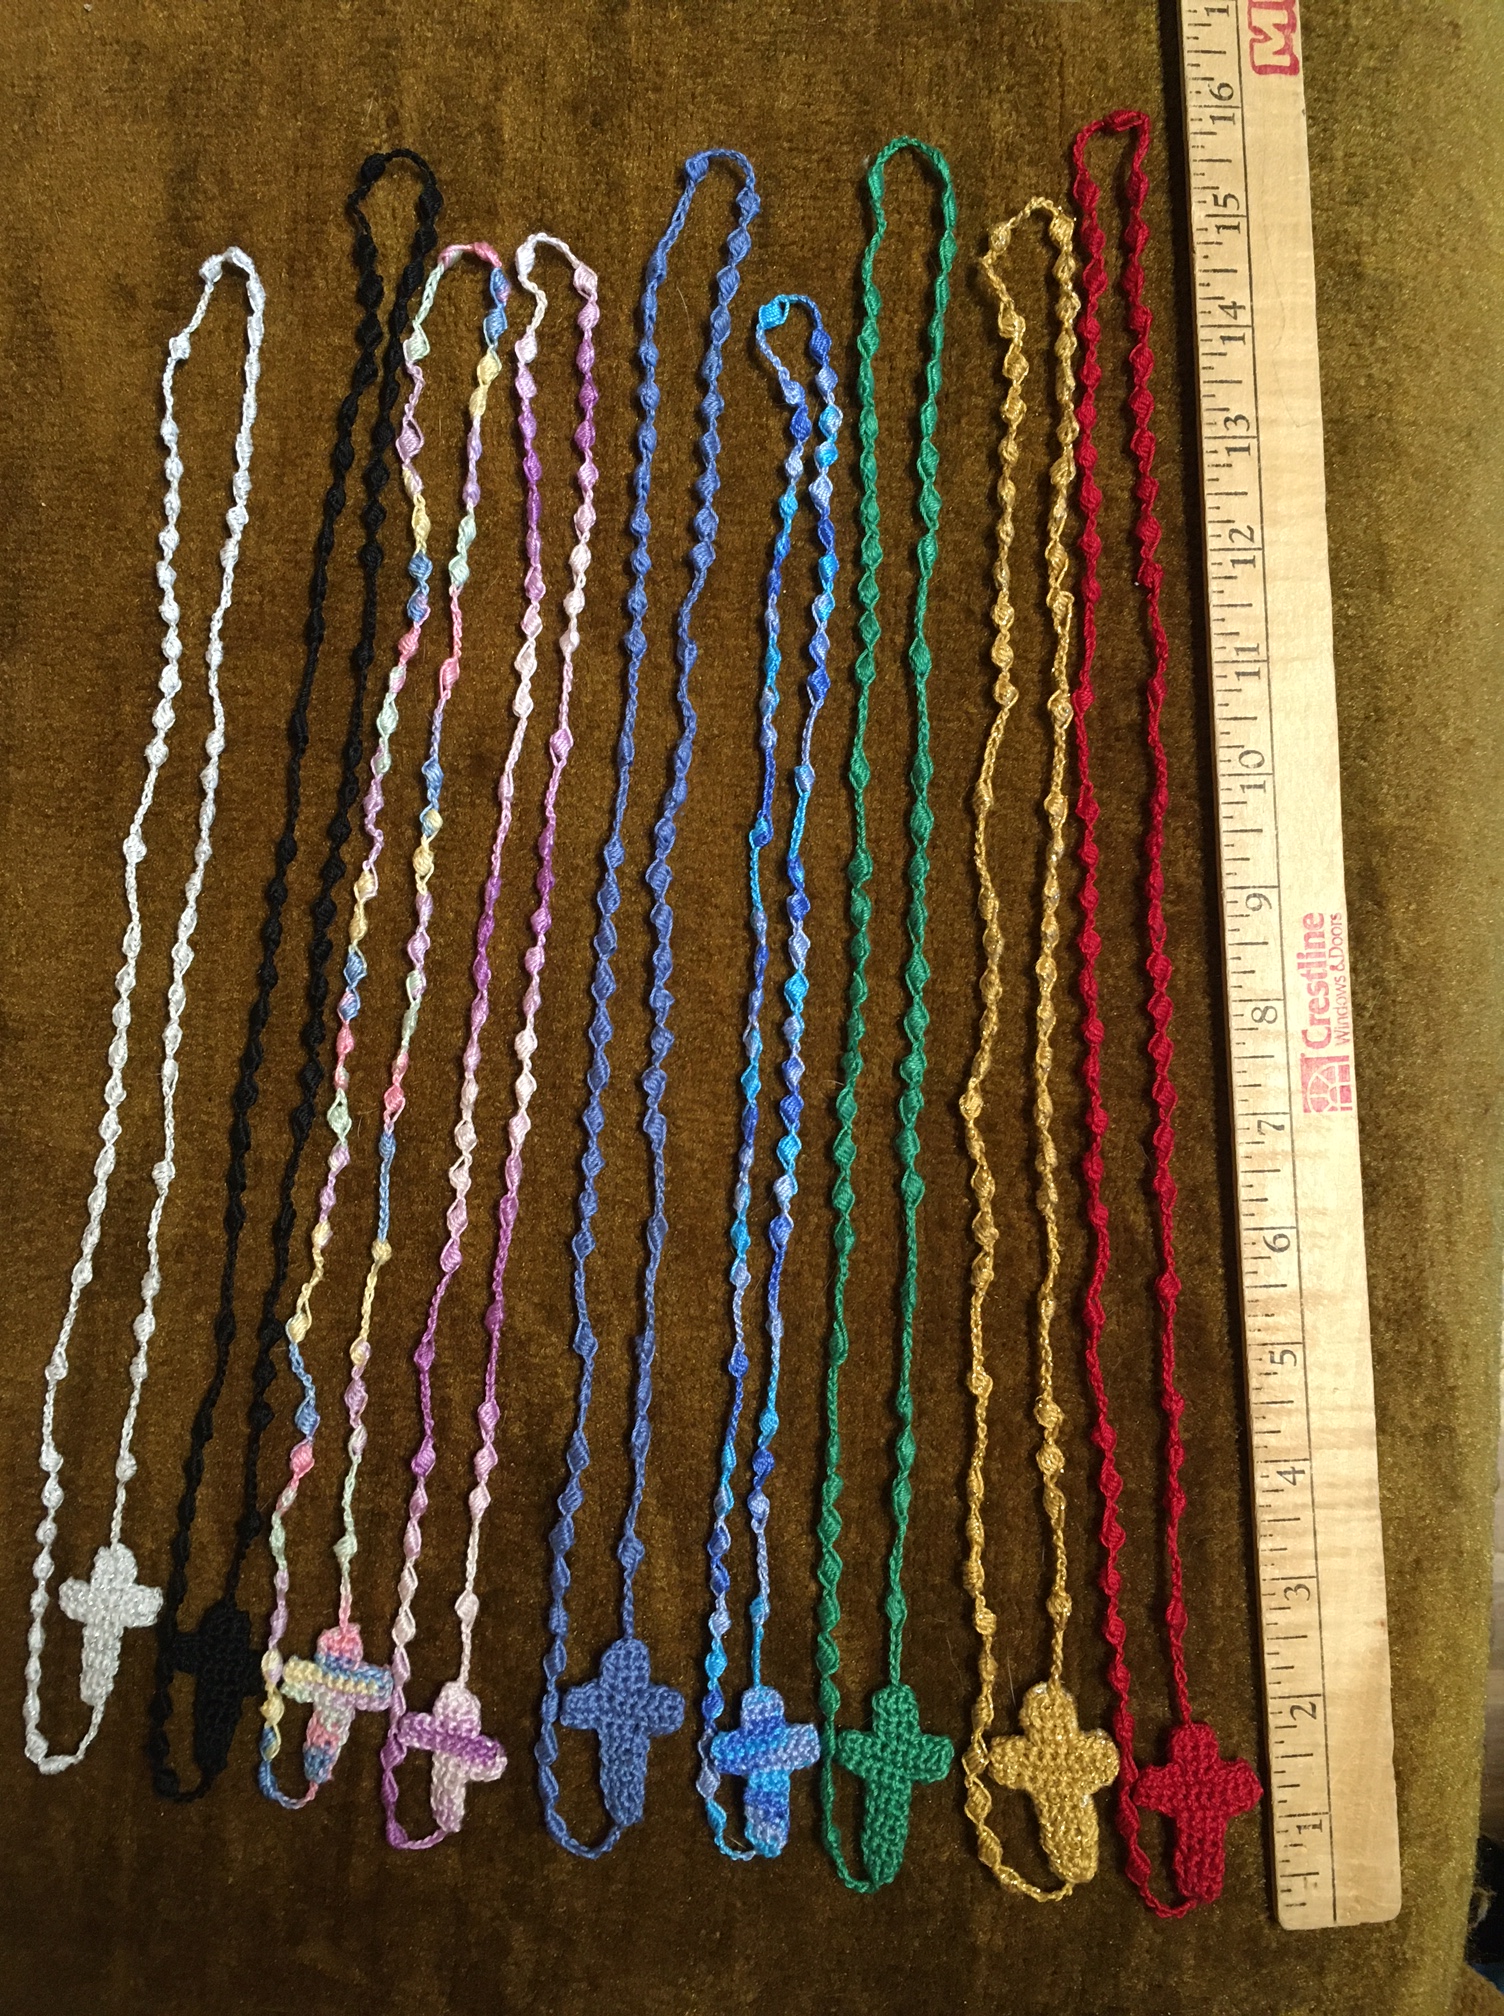
It is a different shape than typical rosaries–some prefer it for praying while driving,
so there’s nothing to dangle from the steering wheel.
Here’s what I came up with after a bit of research, inspiration, fiddling & practise.
I found the ideas for the cross here and here.
The site where (I think) I got the idea for the puff stitches seems to be down.
If anyone knows the origin of this style of rosary,
I would love to give credit to the crochetier who came up with it!
Puff Stitch Rosary
Thread is size 10, aka “Knit Cro-Sheen”
Steel hook size 6 (I’ve used as small as size 9 successfully).
Rosaries vary from 14″-16″ with different colors of thread.
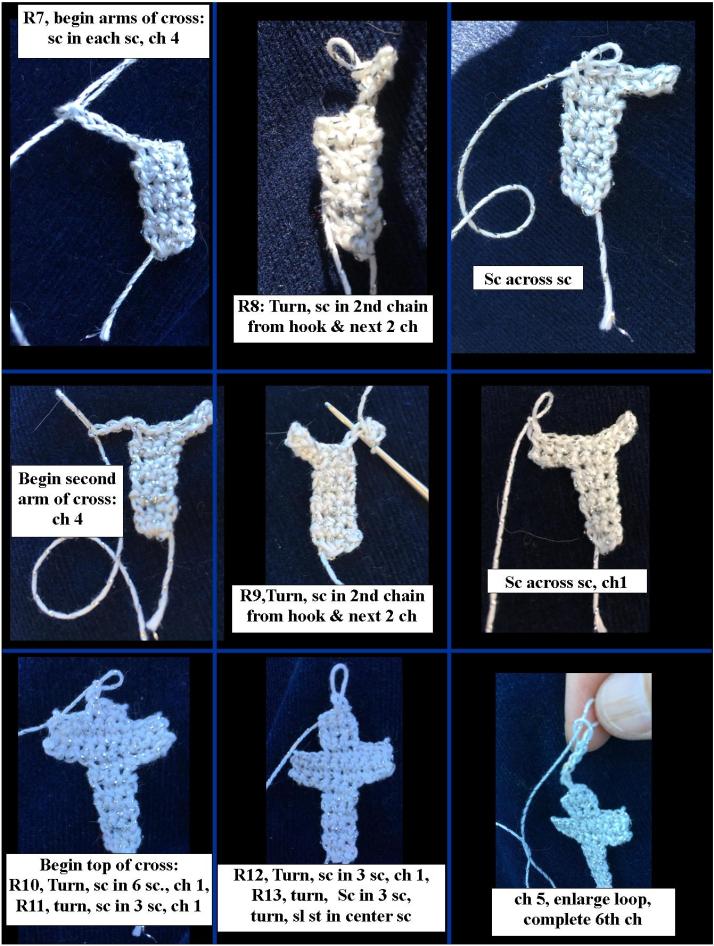
Cross (illustrations follow):
Ch 3, 3 sc in farthest stitch from hook, ch 1, turn
R2-6 (next 5 rows): sc in each sc across (3 sc). Ch 1, turn
R7: sc in each sc across, ch 4, turn (this begins the first arm of the cross)
R8: working across chains just made, sc in second ch from hook & in each ch & each sc.
ch 4, turn (this begins the second arm of the cross)
R9: sc in second ch from hook & in each ch & each sc. Ch 1, turn
R10: sc in next 6 sc. Ch 1, turn.
R11: sc in next 3 sc. Ch 1, turn (this begins the top of the cross)
R12: sc in each sc across, ch1, turn.
R13: sc in each sc across, turn & slip stitch in middle sc.
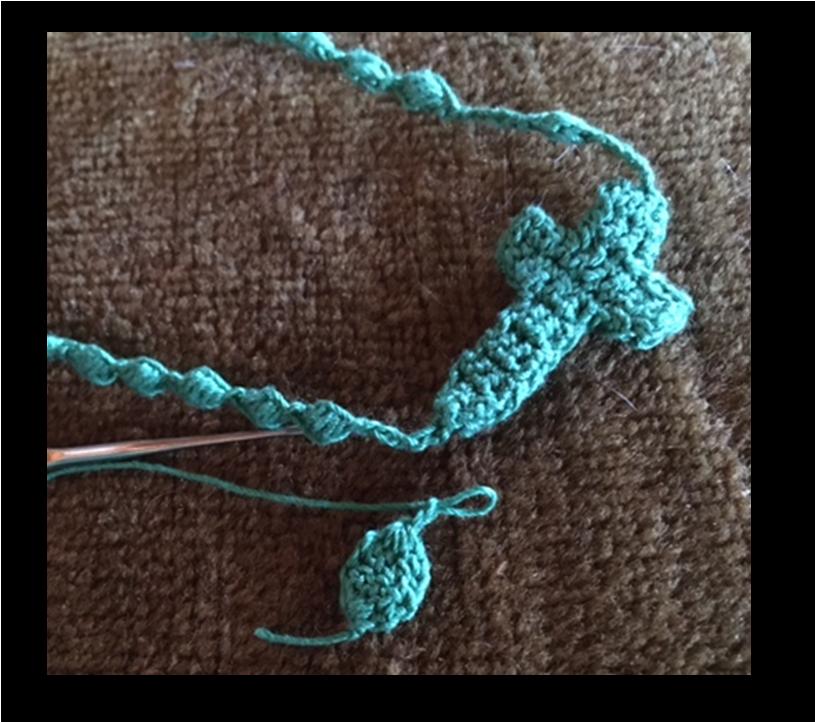
To continue rosary, chain 6, pulling up the 5th chain to enlarge it before completing the 6th chain.

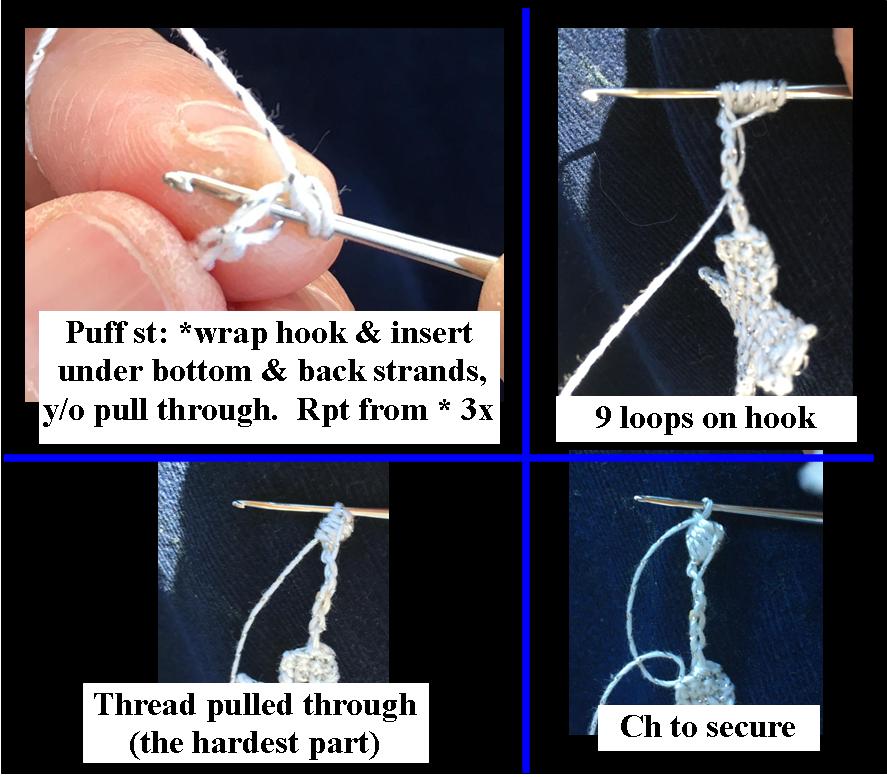
Beads: 9-loop puff stitch
(see notes at bottom of post for tips on where to insert the hook in the ch for the puff st):
Pull working loop back on the hook to get it nice & loose, then return to working position.
*Yo, insert hook in first ch from hook (the loose ch)*, pull up a loop. Keep this loop loose too.
Repeat from * 3 more times (4 total) until you have 9 loops on the hook.
Yo & pull through all 9 loops
(easier said than done & definitely easier if the loops aren’t too tight).
Ch to secure puff stitch.
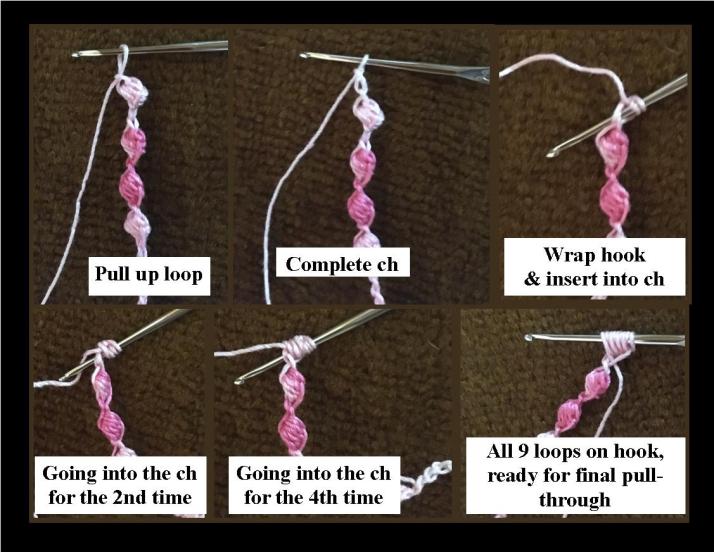
Ch 6, pulling up the 5th chain to enlarge it before completing the 6th chain.
This your first Our Father bead.
Ch 6, pulling up the 5th ch to make room for the first “Hail Mary” puff stitch.
Make a puff stitch into the loose chain.
When you ch to secure the bead, pull up that loop to enlarge it, complete the ch
& puff stitch into the enlarged stitch.
Continue in this manner until you’ve made 10 Hail Mary beads.
Chain 6, make a puff stitch for an Our Father bead, chain 6, make 10 puff stitches for Hail Mary beads,
repeat until you have 5 decades. Do not fasten off.
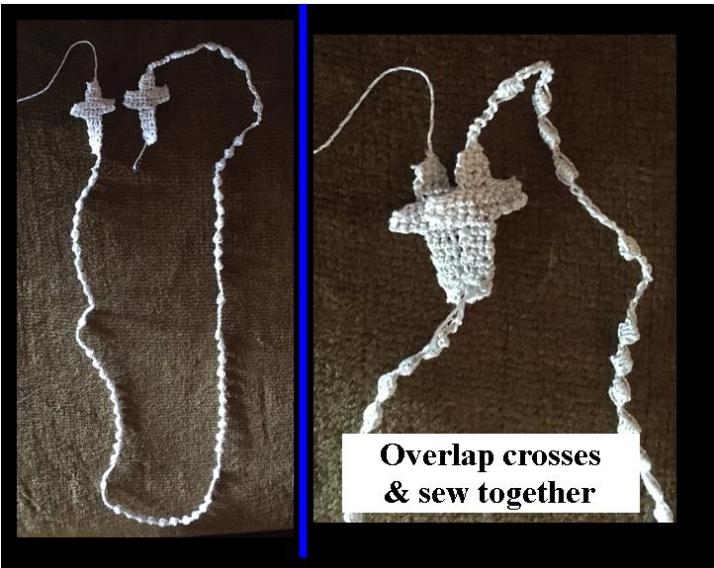
Second cross:
Ch 7, 3 sc in second stitch from hook. Continue with rows 2-13 of cross.
Leave a long tail for sewing & fasten off.
Line up the two crosses & sew together using the tail.
Notes:
*Most instructions are for making puff stitches in a foundation of sc, dc, etc., not in chains. Making puff stitches in chains means deciding which strands of the chain to go through, and different choices yield different results. Going under the top two strands (which is what you’d do with sc, dc, etc.) results in puff stitches that face different directions–mine did so randomly. This is what ended up working best for me:
Insert hook through the hole that naturally opens up as you pull the hook down to go into the stitch, ie., under the back & bottom strands of the chain. They will be the two farthest away from you.
Hail Holy Queen medal option: After last Hail Mary puff stitch, ch 10, dc into 4th chain from hook 4 times. Ch 3, turn. 4 dc cluster into stitches of previous row (the photo is just a sample–I haven’t actually crocheted a rosary with an oval for the Hail Holy Queen–the oval would be crocheted into the rosary if you wanted it). Proceed to second cross.
Please let me know if this pattern needs correction or clarification :).
